
Introduction – Edge-Rind on Mercury
The rocky planets, Mercury and Mars, can suffer particularly badly from a diffraction-related artefact called edge-rind. This artefact results in a thicker and unnaturally bright limb at the sharper, non-terminator side of the planet and is often combined with a darker arc just inside inside this. The phenomenon is worse the more sudden the drop-off in brightness at the limb and is also made worse by the contrast enhancement processing used to bring out real planetary surface detail. You can read much more about edge-rind and the factors that affect its visibility on my related webpage here.
One reason Mercury is particularly badly affected by edge-rind because of its phases, which can mean a more abrupt drop-off in brightness at the affected non-terminator edge. A second factor making it more objectionable, comes from its small size compared to the width of the edge-rind. The width of the edge rind for a given telescope is fixed – its angular width is approximately 0.6x the angular size of the diffraction (Airy) disc that the telescope produces. Because of Mercury’s small angular size, the edge-rind is generally proportionally larger than for Mars. Of course, when Mars is far from the Earth it can be significantly smaller then Mercury, in which case the reverse is true.
Mercury has lower contrast albedo differences than Mars and the edge-rind is generally more even in appearance as a result. This characteristic lends itself to the use of a technique I have developed which is able to pretty successfully suppress the edge-rind effect on Mercury. I have named this technique Spin-Blur Masking.
Spin Blur Mask method – Introduction
The method I have developed to reduce the severity of the edge-rind, has a number of benefit beyond the aesthetic improvement in the appearance of the planet. Not only can treatment using this method reveal suppressed detail at the location of the edge-rind, it also allows you to push the processing further, potentially revealling even more detail over the whole of the planet.
The improvement technique is applied to the normally finished and fully-processed image of the planet. The methods imagers use to produce fully-processed images of planets like Mercury, from videos taken with a high speed digital video camera, are beyond the scope of this article, although you will find much to help you on the Web and on YouTube.
I do all my processing described below in PaintShop Pro, but a similar workflow can be used in other image manipulation packages like Photoshop, provided they have the Radial Blur filter and use Layering.
Spin-Blur Mask method – Principles
The spin-blur method makes use of a feature in image manipulation programs called a layer mask. Because this is at the heart of the method, it is worth understanding a little about what such a feature is before we proceed.
A layer mask works by altering the local opacity of the image it is linked with – dark areas of the mask make that area of the overlying image become more transparent, whilst lighter areas of the mask make the corresponding area of the overlying image become more opaque.
In the spin-blur masking technique I have developed, you create a custom layer mask, based on a spun and inverted version of the image of Mercury. The unnaturally bright edge-rind in the original image has been smeared into a circle in the mask and has becomes dark due to the inversion. This darker area then acts on the edge-rind in the original image making it more translucent and allowing more of a newly created black underlying area to bleed through. The net result is a darkening of the bright edge-rind.
Spin Blur Mask method – Worked Example
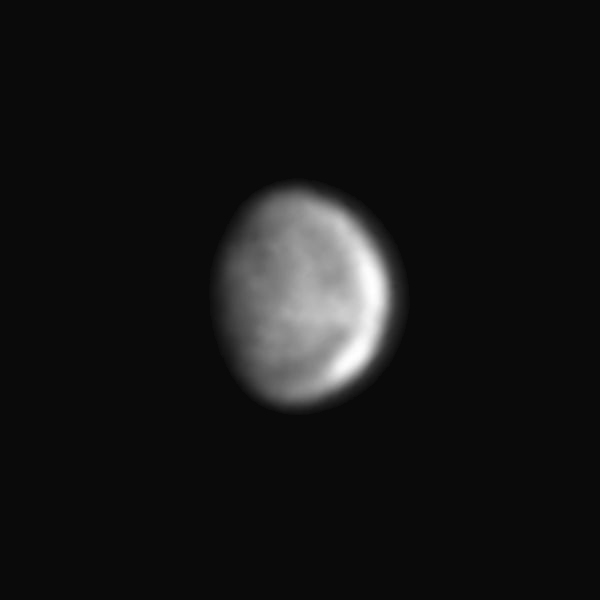
Let us illustrate the procedure with an example image of Mercury taken in Infra-Red with a 222mm Dobsonian telescope in October 2022, and which shows a moderate level of edge-rind on the ‘finished’ processed image.
The procedure I will explain below may seem complicated to start with, but once you are familiar with it, it takes about 10mins to complete and can dramatically improve the appearance and level of surface detail seen in your Mercury images

The first step in the treatment process is to try and crop the image of Mercury so that the centre of the cropped area is as best as possible at the centre of the planet – not at the centre of the visible portion, but the centre of the circle which includes the night-side part. Doing this makes it much easier to then spin the planet about its centre when making the mask.


Next, open up the Radial Blur feature in your image manipulation program. For PaintShop Pro the feature is found as below:

With the Radial Blur feature open, set Blur type to ‘Spin’, strength to 100% and elliptical to Off. Tick the Preview button to see a spin-blurred version of the planet. It is this which will later become go on to become the special mask.

Before clicking OK, you need to check you have the horizontal offset and vertical offset optimised, so that the centre of the rotation is perfectly aligned with the centre of the planet’s disc. Just alter one of these directions by 1% at a time, checking the effect of any changes by toggling the preview on and off. When the circular shape of the spun version matches the diameter and position of the original image you have the correct offsets. If the offset values are not correct the spun copy will be smaller or larger than the original disc. Hopefully the gif below illustrates the situation you are aiming for – mimicing the effect of switching preview on/off. Here the optimum offset has been found to be X=0% Y=+1%

Once you have determined the optimum offset values, apply the radial blur filter by clicking OK.
Next, invert the spun image using Image–Negative Image it to turn it into a negative version as shown below. Save this image.

The next step is to also open the original cropped image from which you produced your spun and inverted version. You want the original and the spun versions both open at the same time, as below.

You now need to turn the spun and inverted image into a mask. This will act on the original image to treat the edge-rind.
In PaintShop Pro, first select the planet image, then go Layers–New Mask Layer– From Image. Now from the drop-down list select the filename of the spun and inverted image you created . Then hit OK. This is shown in the two figures below:


The layer stack that results should look like below, with the new layer mask acting on the original image – the darker areas of the mask will reduce the local opacity of the planet image more whilst the lighter areas of the mask will have less effect on the local opacity.

The next step is to create a black raster layer at the bottom of the stack. The lowest opacity areas of the mask adjusted image will ‘see’ more of this black layer and be darkened the most as a result.
Go to Layer–New Raster Layer to add a new layer and drag it to the bottom of the layer stack as shown below.

To make this layer black, set the foreground colour to black and either fill the layer with the fill tool or paint all over it with the brush tool. Doing this will lead to a significantly darker image of the planet and eliminate the grid pattern that was visible.

The last step in the process is to click on the Mask layer and carefully adjust its contrast and brightness and in so doing to optimise the appearance of the planet’s image. This is where the real magic happens!
With the Mask layer highlighted, go to Adjust–Brightness and Contrast–Histogram Adjustment to bring up the Histogram box and switch on the ‘Preview on Image’ setting at the top. By playing around with the Histogram adjustment High level and the Gamma value, adjust the values until the resulting image looks brighter and the edge-rind is most successfully supressed (in the example below I used Gamma=0.70 and High=175). This takes a bit of practise and you may not be able to fully eliminate the edge-rind but it should be much better than before the treatment. The exact values used will vary from image to image and there are no hard and fast rules, so be guided by the look of the final image.


By suppressing the edge-rind and consequently adding some finesse to the image, you now have scope to futher improve the image by noise reduction and further contrast enhancement methods. As an example of this, I have taken the right hand image above, after spin blur mask treatment, and applied further processing to end up with my final image below which I think you will agree is much better than the original ‘final’ image without treatment, above left!

Additional Refinements
Blurring the middle of the mask
In the example above there was little gross detail in the middle of the planet and for the mask the middle of the disc was relatively featureless.
Sometimes this is not the case and dark and light albedo features present in the original image can produce arcs or central spots in the spun and inverted image that goes to make up the mask. This is not desirable as it will tend to create spurious variations in the middle of the planet in the final image.
To get around this problem it is often worth adding a step to blur out the middle of the spun image as illustrated below:


Positional tweaking of mask layer position
Sometimes benefits in appearance can be gained by making small positional movements of the mask layer with respect to the image layer. These movements might be just a pixel or two in x or y.
To see if there is any benefit in doing this, click on the mask layer, select the movement tool, and click the cursor buttons up/down & left/right one click at a time to move the mask layer. Don’t lose track of where you are so you can go back to the original position if there is no benefit gained.